I’ve been working with Azure Web Apps for Containers a lot lately and it’s a great way to dip your toe in the container world, without having to manage a container orchestrator. However, there are a few rough edges that need to be sorted out when you get started.
One of those aspects is mounting volumes.
What are volumes?
Volumes allow you to persist data that lives outside of your container. It does not only keep your container image small, but it also allows users to load different content based on the scenario. This is a great way to load configuration for your container which is then parsed at runtime.
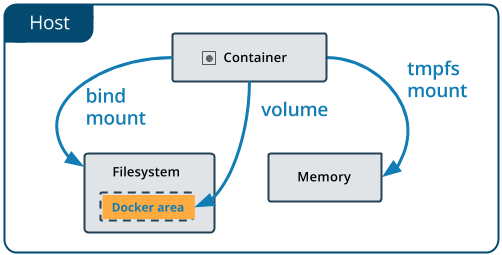
In the past, I was using environment variables for configuring my containers, but over time as the amount grew it felt more like an anti-pattern. Another downside was that everything was part of my release pipeline, while with a configuration file I can commit this to source control and version it with my app.
Here is an example of how you can use --volume/-v to mount a file to /config/metrics-declaration.yaml inside the container via the Docker CLI:
| ⚡ tkerkhove@tomkerkhove C:\ | |
| ❯ docker run -d -p 8999:80 --name promitor-agent-scraper \ | |
| --env PROMITOR_AUTH_APPID='<azure-ad-app-id>' \ | |
| --env-file C:/Promitor/az-mon-auth.creds \ | |
| --volume C:/Promitor/metrics-declaration.yaml:/config/metrics-declaration.yaml \ | |
| tomkerkhove/promitor-agent-scraper:1.0.0-preview-8 |
Long story short, I had a YAML configuration file with an Azure Web App for Container instance but how do I mount the volume?
Mounting volumes in Azure Web Apps for Containers
After some investigation it seems like there are two options to approach this:
- Persisted Shared Storage will mount webserver as persistent storage to the
/homefolder of your container. Shared storage is turned on by default, but can be turned off by configuringWEBSITES_ENABLE_APP_SERVICE_STORAGE=false. (docs).- If you are using Docker Compose, you can map volumes in there.
- Bring-Your-Own Persisted Storage (preview) allows you to mount an Azure Storage Blob container or file share into your container. (docs)
So basically you have to choose between using the storage that is already there but have no control over where it is being mounted. Or you can manage your storage and mount one or more file shares or blob containers into your container.
Both storage options allow you to mount the files but it’s important to note that the storage is shared across all instances and not providing copies. This is good because you can manage everything in one place, but can also be bad because this can become your bottleneck over time.
In our case we chose to bring our storage because we do not want to mount to /homeso have no other option. Another reason is that we’d like to only mount what we need rather than the whole web server.
But how do my files end up there?
Well, you have to provide them! As part of your release pipelines, it’s up to you to provide that step.
Keep in mind that if your deployment fails, you might potentially overwrite a configuration that you needed for rolling back.
That’s of course for when you are using it to load configuration rather than just persisting data.
Mounting a volume with bring-your-own persisted storage
Now let’s take Docker CLI example from above and deploy it on Azure Web Apps for Containers!
Creating a new Azure Web App for Containers
Open the Azure Portal, go to “Create a resource” and search for “Web App for Containers”.
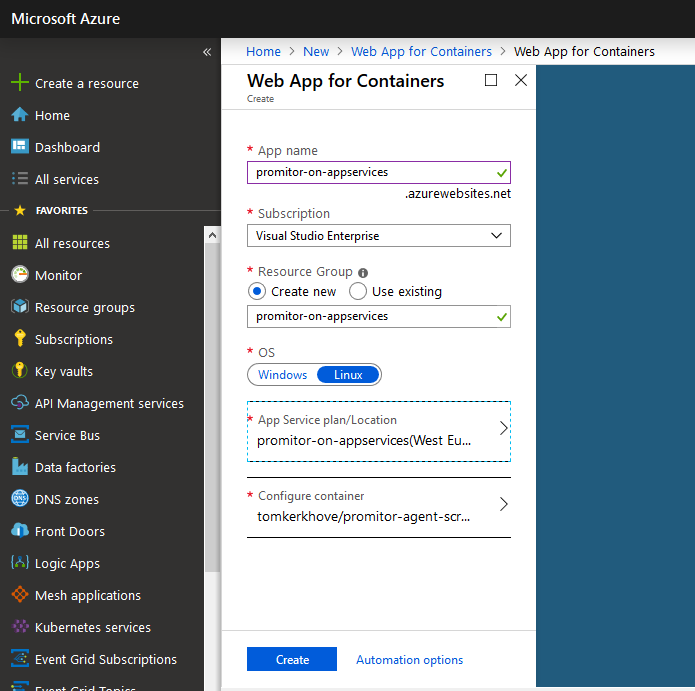
Once created, you’ll see that the app is broken:

If you browse to the “Container Settings” to see what container is configured, what the logs are and configure continuous deployment for the specific image & tag.
In the logs, you can not only see that my ASCII art is broken (😱) but also that it was not able to find the metrics declaration on /config/metrics-declaration.yaml because we didn’t load it.

Note: for Promitor to work the other environment variables need to be configured as well via “Configuration”
Mounting an Azure Blob storage account
Before we can mount our volume, we need to create a new Storage account:
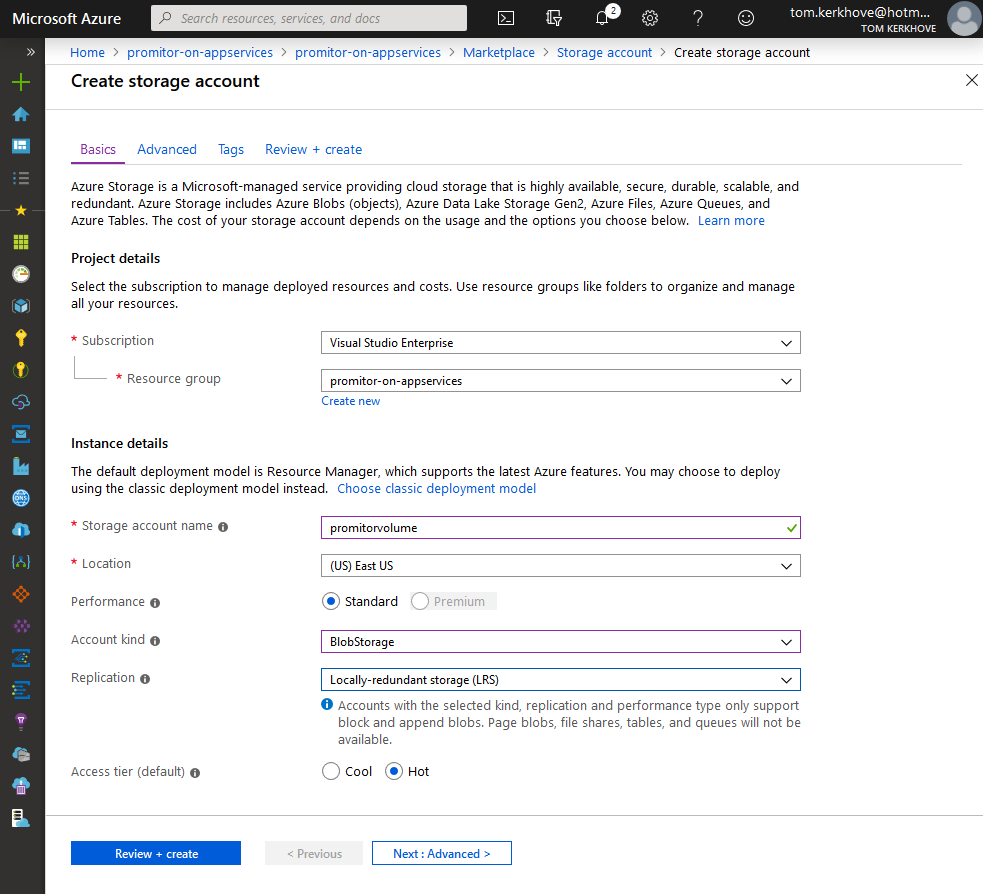
Once it is provisioned, create a container called container and upload the configuration.

Now it’s time to mount our blob container!
Browse to the web app, select “Configuration” and open the “Path mappings” tab.
Click “New Storage Mount” and select the storage account and container you’ve just created and hit save:
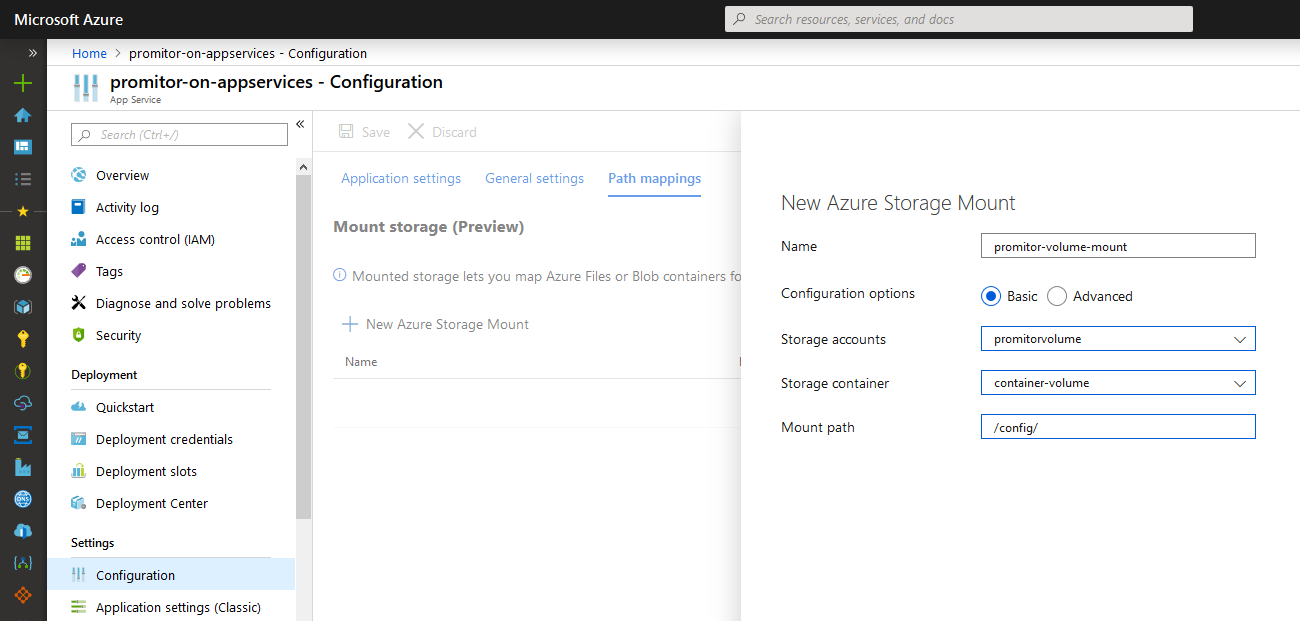
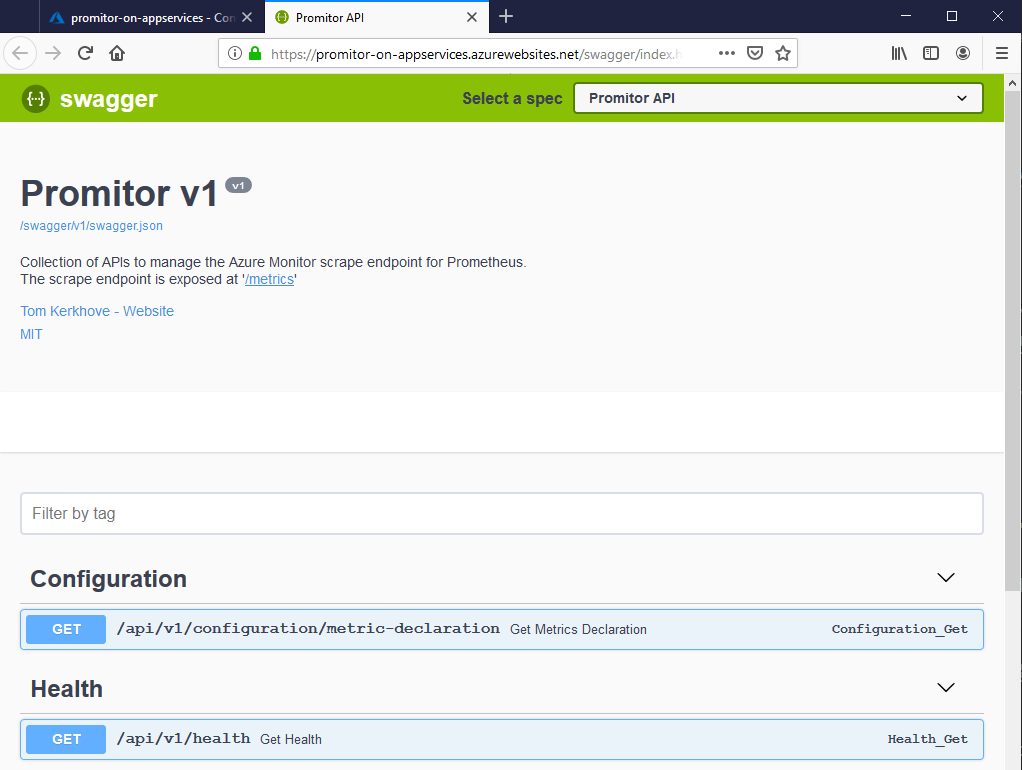
App Services will instantly redeploy your container with the volume mount and Promitor is up & running!
Automation is the hardest part
As Azure Web Apps for Containers with bring-your-own storage is in preview it seems that automation is the hardest part.
resources.azure.com is a great way to find how you can configure ARM resources based on a running instance. Unfortunately, this feature is not surfaced in there yet. I’ve tried numerous approaches but could not get it right, but once it does I’ll write a new post on it.
Luckily, the Azure CLI supports this via az web app config storage-account add (docs)!
| ⚡ tkerkhove@tomkerkhove C:\ | |
| ❯ az webapp config storage-account add --resource-group "promitor-on-appservices" ` | |
| --name "promitor-on-appservices" ` | |
| --custom-id "promitor-volume-mount" ` | |
| --storage-type AzureBlob ` | |
| --account-name "promitorvolume" ` | |
| --share-name "container-volume" ` | |
| --access-key "<redacted>" ` | |
| --mount-path "/config/" ` | |
| --slot-setting ` | |
| --output table |
This will do for now, but ARM would be the real sweet spot!
Conclusion
Azure Web Apps for Containers is a great way to run container workloads without having to manage a container orchestrator.
However, the documentation on mounting volumes is not quite clear or discoverable while it’s pretty trivial. For what it’s worth, bring-your-own storage is still in preview so that’s fair!
If you need to mount your volume, I’d recommend going with Azure Storage because it easily allows you to migrate from Azure App Services to another container service given your data is in Azure Storage anyway!
However, you do not want to lose your data so don’t forget to add resource locks to prevent accidental deletions.
Thanks for reading,
Tom.
Subscribe to our RSS feed