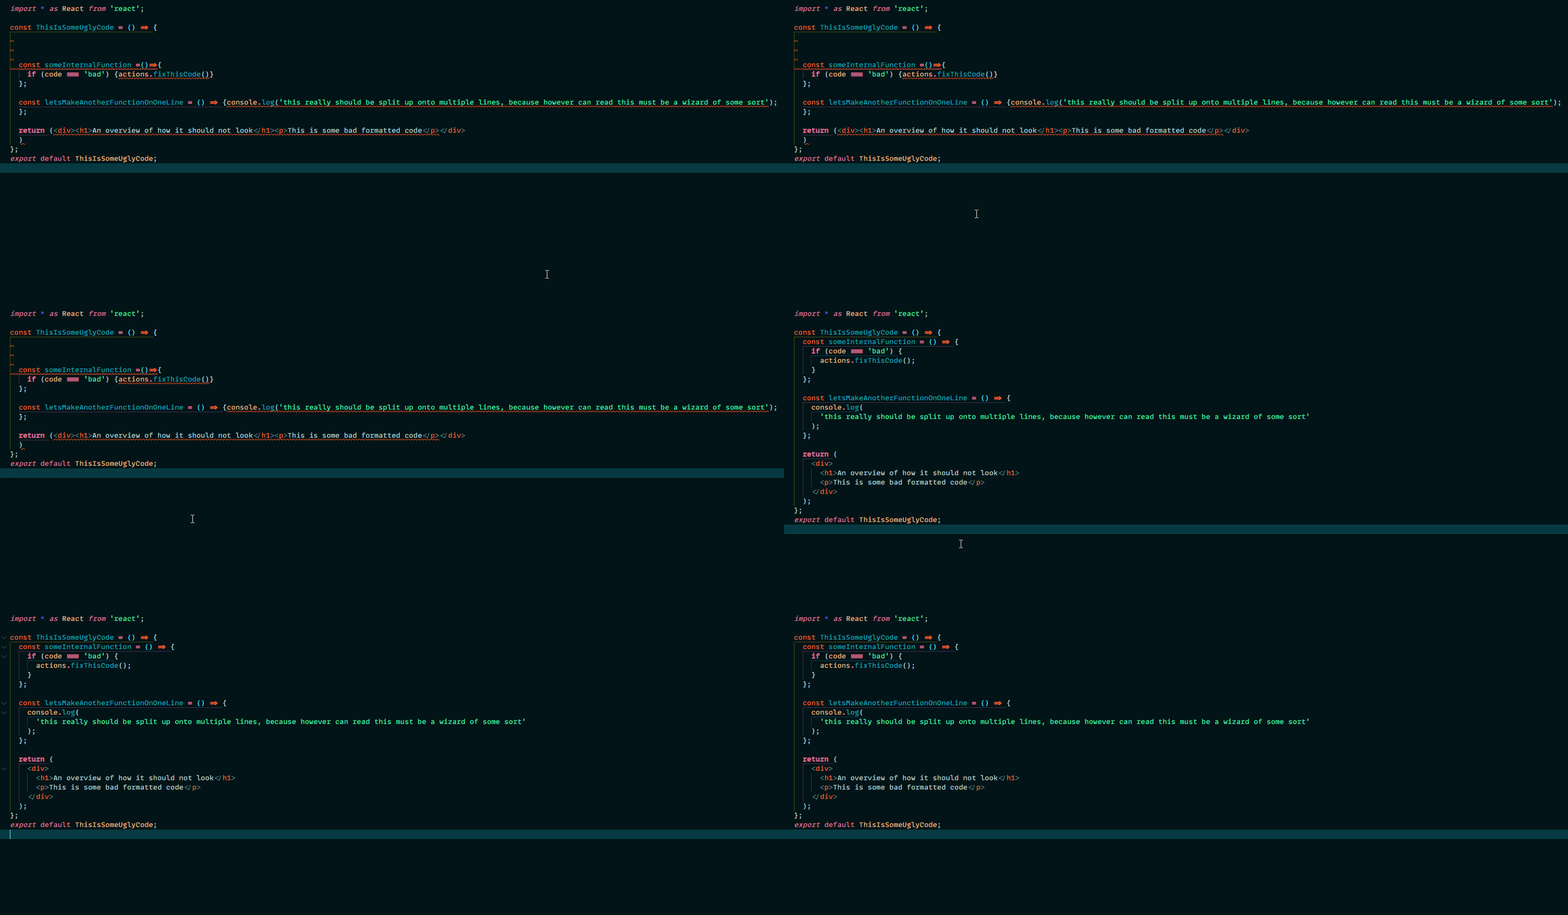
There are two types of tools that can help you improve your code without performing any heavy lifting yourself: code analyzers (or linters) such as ESLint and code formatters like Prettier.
Firstly, let us take a look at code analyzers. I will be using ESLint as my main tool, but most principles we will discuss can also be applied to other code analyzers.
Linting
The use of a code analyzer like ESLint should be part of your development flow, regardless of your team’s size. It is easy to implement in any codebase and can help with minimizing errors, while improving code quality along the way.
Take a look at the example below:
You might not immediately see something wrong with this code, but after some further inspection 🧐, you’ll notice the following remarks:
- userGuid is declared with let, but it doesn’t get updated, so we should use const instead
- constantNumber is declared with var, which is an old notation. We now use ES6 or anything newer
- The while loop can never end, as constantNumber will never be 2
- constantNumber == 2 is also wrong; it is better to use a more strict comparison like ===
It is certainly okay if you make some of these mistakes, and I’m sure a colleague will point them out on your pull request. Nevertheless, it is even better if you see the errors straight away, in your IDE or while writing your code. After a while, you won’t make such mistakes anymore because you learnt from the mistakes (or you fear the linter 🤖 ).
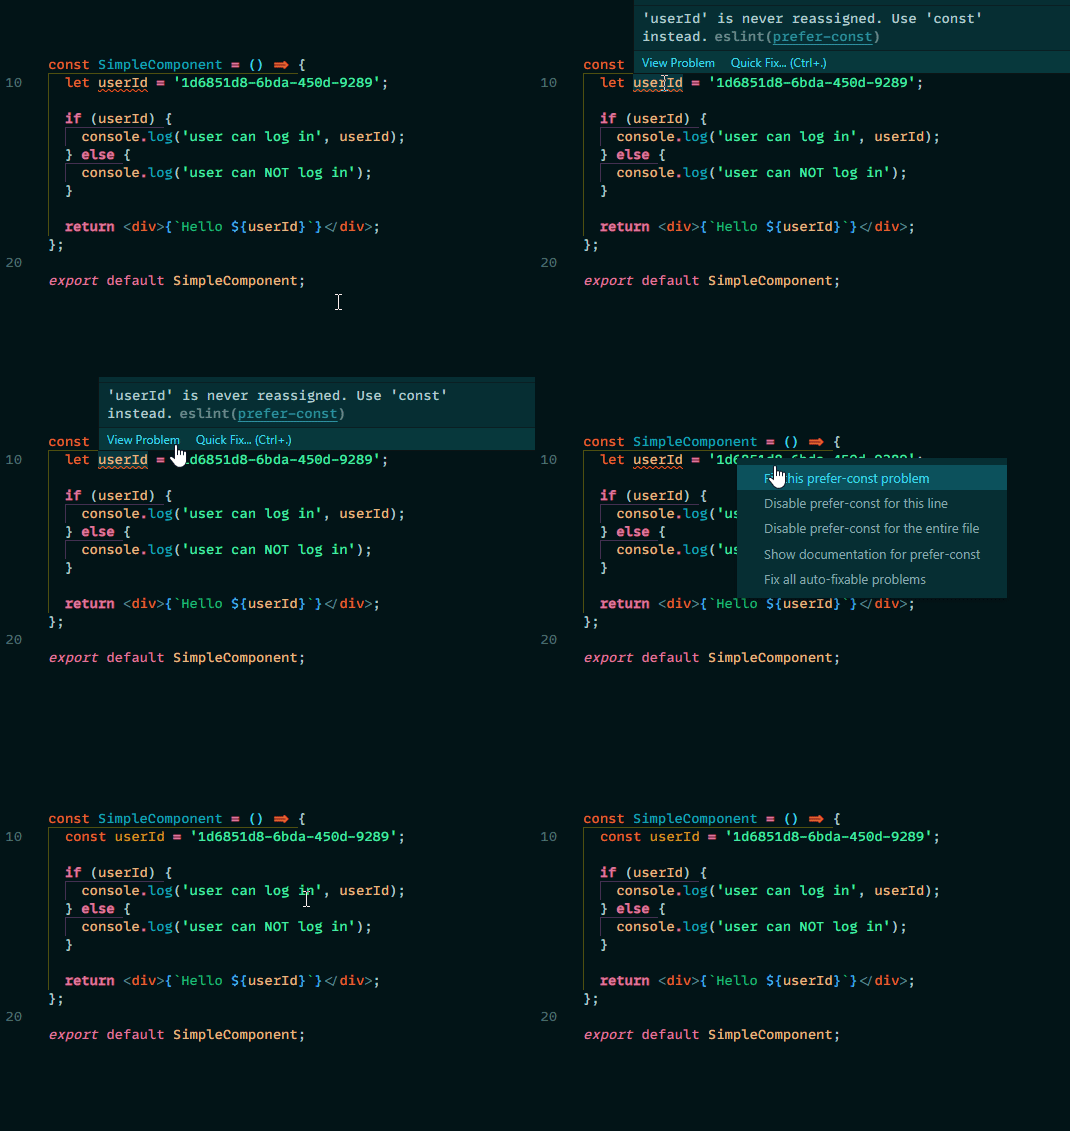
You can see an example of a linter in action below:

If you look closely at the example, you can see why the let variable was highlighted by the linter. ‘userId’ is never reassigned. Use ‘const’ instead. eslint(prefer-const)
This sentence refers to a rule set by the linter. That’s how these linters work. You configure a set of rules to follow (see the possible rules here https://eslint.org/docs/rules/) that will be analyzed when writing your code. You can choose to follow a recommended group of rules, or create your own combination or a bit of both. Simply select a preconfigured ruleset and extend it with other sets or rules you find essential.
Besides running the linter in the background and telling you what you could do better, you can also configure it to run and automatically fix some of these issues when you commit.
They certainly help you write better code, but they are also super easy to set up, even without prior knowledge. Even if you are just a solo developer or working in a team, you should still definitely set up a linter for your codebase.
ESlint has a pretty awesome getting started guide to implement this tool in your codebase, which you can follow here: https://eslint.org/docs/user-guide/getting-started
Formatting
At this point, you have seen that linting is mostly about catching small bugs while coding. So what about formatting? Everyone might use different basic formatting rules: for example, the maximum width of a code line, to keep everything readable. But the problem with different rules per person is that you might miss out on important updates, because they can fill up pull requests with a lot of code-style changes.
With Prettier, you can generalize this for yourself and all of your team members. So your code gets formatted the same as anyone else and your pull requests will only show the meaningful updates. All of this awesomeness is magically triggered when you create a new commit.
Need more? Check out the Prettier editor integration, configure it, hit save on any file, and voila: your code is formatted.

Triggered? Learn more about Prettier on their website.
That’s all folks!
Thanks for reading,
Laurens
Subscribe to our RSS feed